EL Pipeline: Move your data around with Pathway
 Olivier Ruas
Move Around Your Data with Pathway
In this article, you will learn how to use Pathway EL pipeline to move data from different data sources (Extract) to the sinks of your choice (Load). You will learn how to configure and run the pipeline without touching any Python file by simply customizing a single YAML file.

The Importance of Data Movement
Moving and processing data is crucial for organizations: data movement is the backbone of modern data architectures, the information flowing from various sources to data storage where it can be analyzed and utilized. Extract and Load (EL) pipelines centralize data from various sources into a single location, simplifying data management and analysis. This centralization enhances data accessibility, ensuring stakeholders can easily access necessary data for informed decision-making.
Effective data movement is beneficial for data engineers, data scientists, and analysts who rely on timely and accurate data to perform their tasks. Data movement is the foundation of real-time analytics, data integration, and the development of machine learning models. Whether you're dealing with transactional data, IoT streams, or user interactions, the ability to move data swiftly and reliably is essential for deriving meaningful insights and making informed decisions.
Simplifying Data Movement with Pathway Live Data Framework EL Pipeline
The Pathway Live Data Framework is a powerful Python framework designed for real-time data processing. One of the core features of the Pathway Live Data Framework is numerous connectors which allow users to connect to a wide range of data sources and sinks. This flexibility makes the Pathway Live Data Framework an ideal choice whenever you need to integrate data from disparate systems.
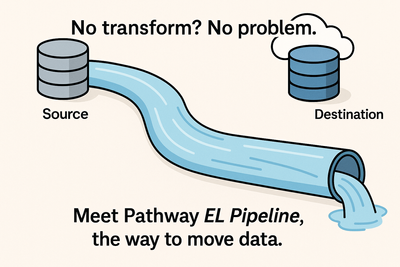
Pathway EL (Extract, Load) pipeline template allows you to ingest data from different sources and load them into the data sinks of you choice. You can define entire data movement workflows in a single YAML configuration file, eliminating the need to modify Python code.
Once the pipeline ready, the data will flow from the data sources to the data sinks in real-time!
Getting Started
To get started with the EL Template, you simply need to clone the Pathway GitHub repository:
git clone https://github.com/pathwaycom/pathway.git
And then go to the associated folder:
cd examples/templates/el-pipeline/
Configuring the Pipeline
YAML templates in the Pathway Live Data Framework provide a declarative way to specify data sources and destinations.
You can set everything up in the YAML configuration file app.yaml.
The YAML format allows you to assign tags to key-value mappings, by prepending a chosen string with !.
In case of callables, such as connectors, they are called with arguments taken from the mapping.
If you want to reuse a variable var in the YAML file, declare it starting with $: $var: ....
You can learn more about the syntax in the associated article.
Declaring a Data Source
You can set up an input data source by mapping the corresponding Pathway Live Data Framework input connector to a variable.
As an example, you can set up a file system input connector by declaring a variable source as follows:
$source: !pw.io.fs.read
  path: ./input_data/
  format: binary
  name: input_connector
While optional, it's best to declare the name variable for persistence, it will be used as the name for the snapshot that stores the connector's progress.
Declaring a Data Sink
Similarly, you can send the data to a data sink by mapping the corresponding Pathway Live Data Framework output connector to a variable.
You will need to pass a variable containing the data from the data source as the table variable.
As an example, you can output the previous data read the file system as a CSV file using a CSV output connector by doing as follows:
output: !pw.io.csv.write
  table: $source
  filename: ./output.csv
  name: output_connector
Note: there is no $ here as the variable will not be reused in the YAML file.
Connectors
The Pathway Live Data Framework supports a wide range of connectors to connect from and to the data sources or sinks of your choice.
Take a look at the list of connectors and select the ones you need!
Schema
In our example, binary files are from the file system and are written to a CSV file. This seems a bit artificial because the binary data is not a good fit for the CSV format. To make the example more interesting, the data needs to be structured, like from a JSON. For this, you will need a schema.
In the Pathway Live Data Framework, data is represented in the form of tables.
The structure of each table is defined by a schema, which serves as a blueprint for the data.
The schema ensures that the column types are correctly preserved, regardless of variations in the incoming data.
Several connectors do not require a schema, but we strongly encourage you to use them whenever you can.
You can learn more about schemas here.
To define the schema in the YAML file, you can use pw.schema_from_types.
The schema uses the supported data types.
To define a table with a single column text containing strings you can do:
$schema: !pw.schema_from_types
  text: str
A table with three columns colA, colB, and colC containing respectively strings, integers, and floats:
$schema: !pw.schema_from_types
  colA: str
  colB: int
  colC: float
You can then use the schema by passing it as a parameter to the connector:
$source: !pw.io.csv.read
  path: ./input_data/
  schema: $schema
  name: input_connector
Note:
- The
$is not required, but it should be used if the schema is used in the connector inside the YAML file. - One schema can be used by several connectors.
Persistence
To preserve the state of a computation or be able to recover from a failure, you need persistence. It can easily be done using Pathway persistence API.
You can easily configure persistence using the file system by defining persistence_config as follows:
persistence_config: !pw.persistence.Config
  backend: !pw.persistence.Backend.filesystem
    path: ./persistence_storage/
Note that the persistence_config should not be a variable (and thus not start with $), otherwise it'll not be read.
For persistence, it is better to give a name to your connectors.
You can also persist your data on S3 and Azure using the associated Backend.
Pathway License
If you are using advanced connectors or functionalities like SharePoint connectors or persistence, your project will require a Pathway Live Data Framework Scale license. You can learn about the license here, and you can get a free Pathway Live Data Framework Scale license here.
Setting up the license is easy, you simply need to set it as the environment variable PATHWAY_LICENSE_KEY:
export PATHWAY_LICENSE_KEY=your_pathway_key
Small example: From JSON to CSV
Let's go back to our previous example, but now you want to transform your semi-structured JSON files to structured CSV files. You first need to define the schema of the data in JSON file, use it to define the data source, and then define the data sink. It should look like this:
$schema: !pw.schema_from_types
  colA: str
  colB: int
  colC: float

$source: !pw.io.fs.read
  path: ./input_data/
  format: json
  schema: $schema
  name: input_connector

output: !pw.io.csv.write
  table: $source
  filename: ./output.csv
  name: output_connector

persistence_config: !pw.persistence.Config
  backend: !pw.persistence.Backend.filesystem
    path: ./persistence_storage/
That's it! You can now run it.
Run it
You can now run the Python file directly python main.py or use Docker for this.
The data will be moved from data sources to data sinks in real-time: every time a new data point arrives in the data source, it will be moved automatically and with low latency to the corresponding data sink!
You can learn more about running Pathway templates here.
Example Configuration: From Kafka to PostgreSQL
Since our JSON to CSV example is relatively straightforward, let's focus a more advanced and industry-standard data pipeline: moving data from Kafka to PostgreSQL.
This time, you will need to use Pathway Kafka input connector and Pathway PostgreSQL output connector. As previously, you simply need to define each parameter for the corresponding Pathway Live Data Framework connectors in the YAML configuration file:
$InputStreamSchema: !pw.schema_from_types
  date: str
  message: str

$rdkafka_settings:
  "bootstrap.servers": $KAFKA_HOSTNAME
  "security.protocol": "plaintext"
  "group.id": $KAFKA_GROUP_ID
  "session.timeout.ms": "6000"
  "auto.offset.reset": "earliest"

$kafka_source: !pw.io.kafka.read
  rdkafka_settings: $rdkafka_settings
  topic: $KAFKA_TOPIC
  format: "json"
  schema: $InputStreamSchema
  autocommit_duration_ms: 100
  name: input_kafka_connector

$postgres_settings:
    "host": $DB_HOSTNAME
    "port": $DB_PORT
    "dbname": $DB_NAME
    "user": $DB_USER
    "password": $DB_PASSWORD

$table_name: "messages_table"

output: !pw.io.postgres.write
  table: $kafka_source
  postgres_settings: $postgres_settings
  table_name: $table_name
  name: output_postgres_connector

persistence_config: !pw.persistence.Config
  backend: !pw.persistence.Backend.filesystem
    path: ./persistence_storage/
For this template to work, you need to declare your environment variables (DB_HOSTNAME, etc).
In a production environment, managing environment variables and sensitive information like database credentials requires a more secure and scalable approach than simply using a .env file.
You should use the services or tools specific to your production environment to handle sensitive data such as environment variables and credentials.
For cloud-based configurations, you should use AWS Systems Manager Parameter Store, Azure Key Vault, or Google Cloud Secret Manager.
With this, your data will be flowing from Kafka to PostgreSQL in real-time.
Going Further
Using Pathway Live Data Framework EL Template, you can now move your data around as you like in real-time.
What's next?
The EL pipeline is moving raw data, without modifying it. Using raw data is not practical as it can contain a lot of noise. You will need to clean it and then process it to gain insights from it: that's the T (Transform) of the ETL!
One of the key benefits of ETL pipelines is their ability to support layered architectures, which are designed to separate data processing into distinct stages. This separation allows for better organization, management, and optimization of data workflows. Among the various layered architectures, the medallion architecture has gained significant traction for its effectiveness in managing data processing tasks.

The medallion architecture typically consists of three layers: bronze, silver, and gold. The EL pipeline is a perfect fit for the bronze layer that is responsible for ingesting raw data from diverse sources and storing it in its original format. This initial step is vital as it sets the foundation of the following data processing and analysis in the silver and gold layers. By efficiently moving data into the bronze layer, data engineering teams make sure historical data is always available for data lineage and backfilling. Similarly, you can use the EL pipeline to move the data from the gold layer out of the system to be consumed as is by the different applications.
For the silver and gold layers, you need a transform step. Fortunately, Pathway is also very good at that! The Pathway Live Data Framework allows you to transform your data in real-time: don't hesitate to looks at the other ETL templates!